This document serves as your indispensable guide, offering clear instructions, insights, and tips for leveraging the full potential of our platform. Inside this manual, you’ll discover how to get started, navigate our user-friendly interface, perform self-assessments, and interpret the results to gain valuable insights into your strengths, weaknesses, and areas for personal development. Learn how to set goals, track your progress, and access resources to support your academic and personal growth aspirations.
Here is the step-wise flow for creating an assessment. You can follow these steps and can use the system.
Video Tutorial #
Access the Assessment Section #
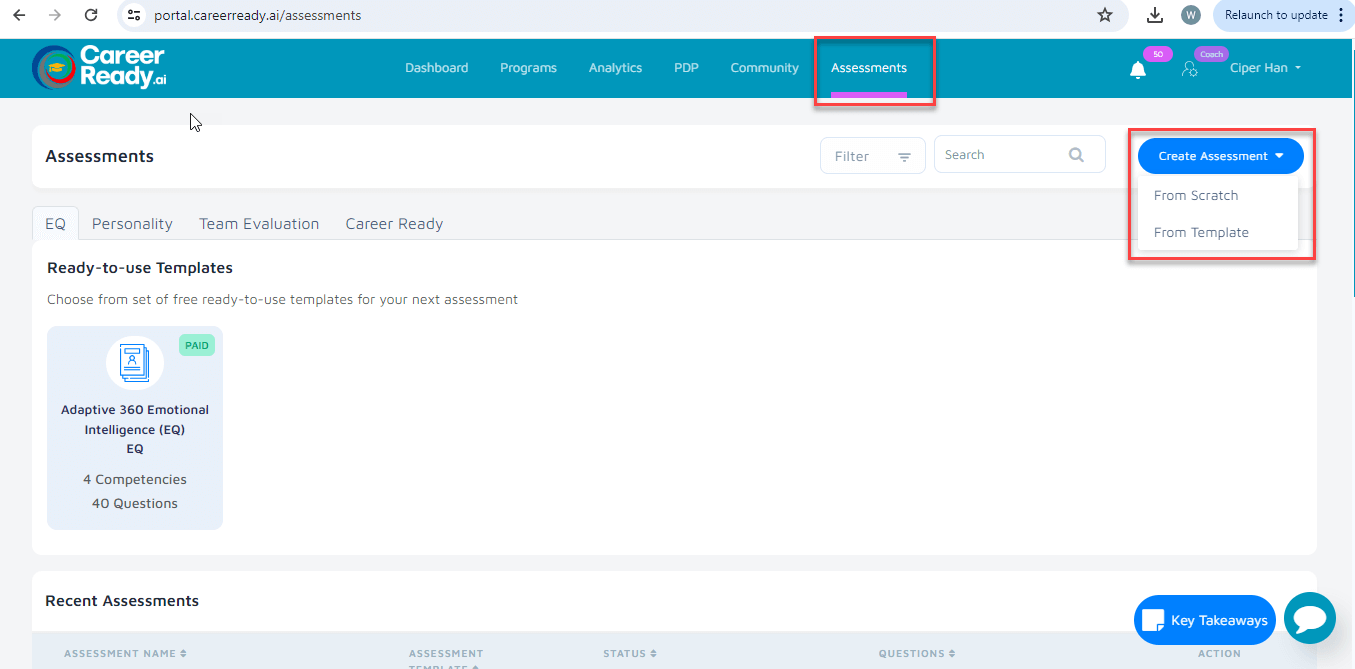
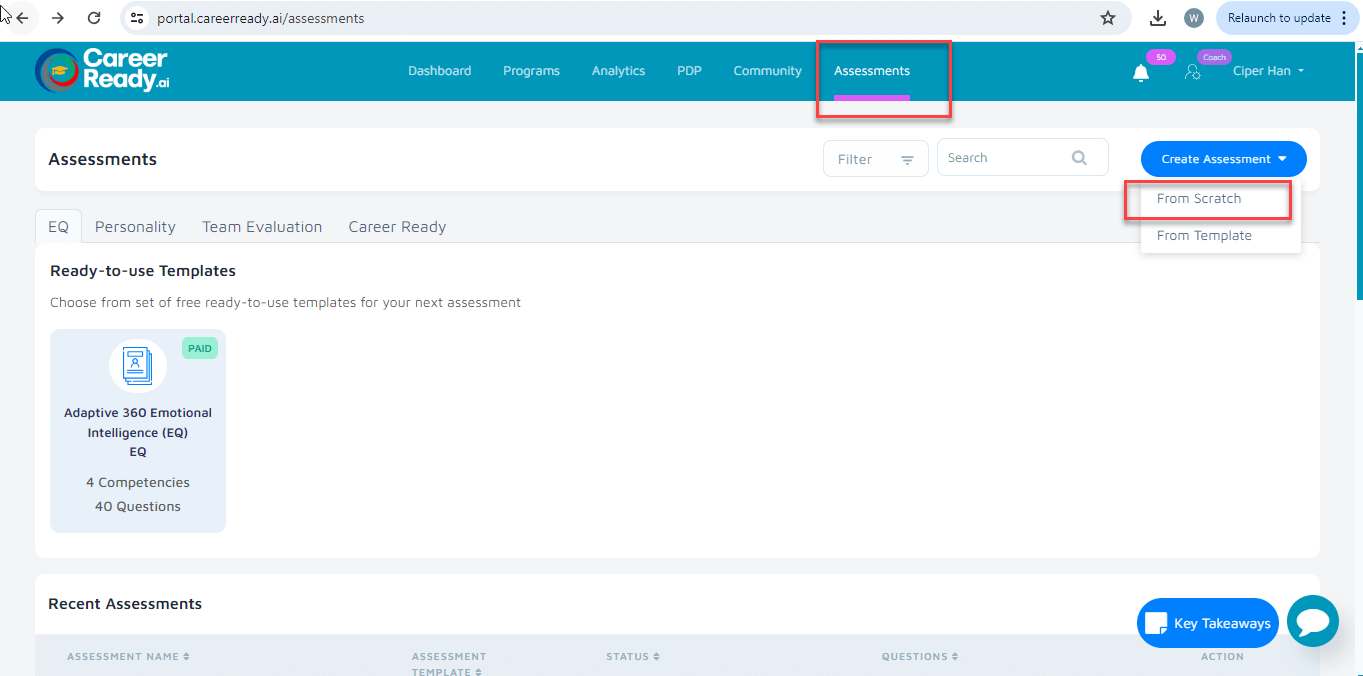
Go to the assessment section to create a new assessment for your program. You can use the ready-to-use template for your assessment or can create your own assessment from scratch.
Creating assessment using a template #
Select Template #
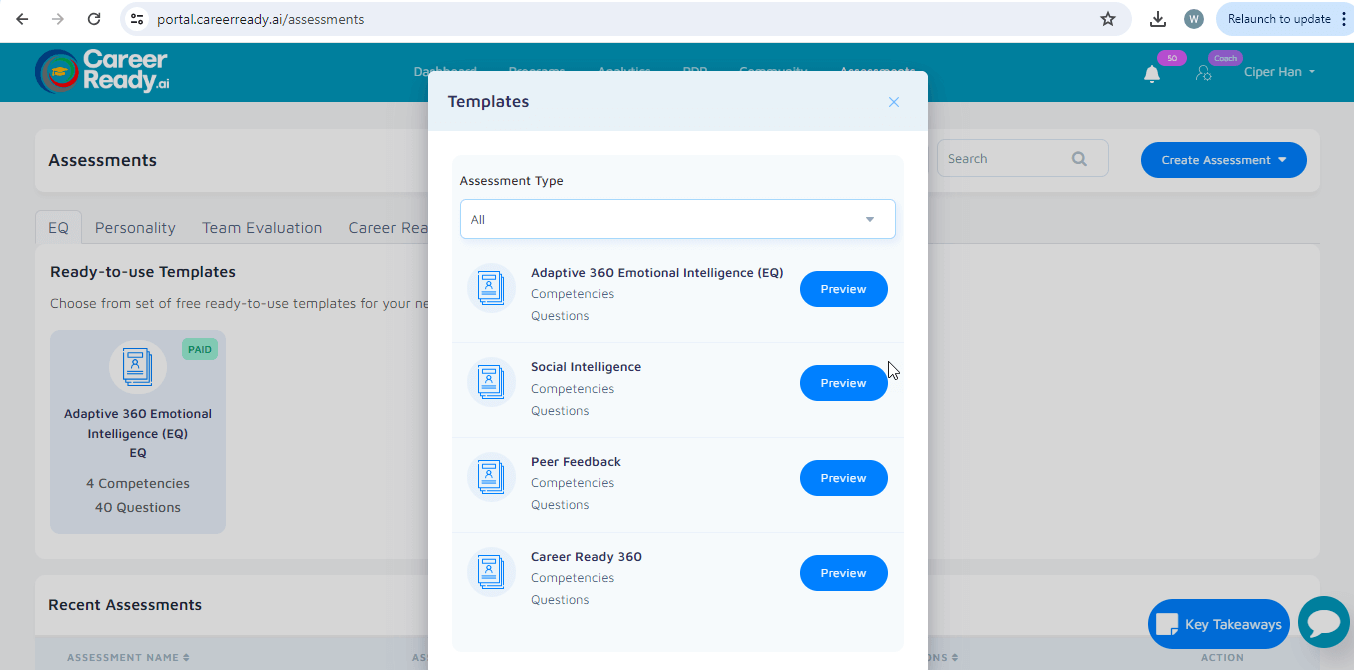
To create an assessment using a template, select the “From template” option and you can preview the templates based on your selected assessment type.
Modify Template #
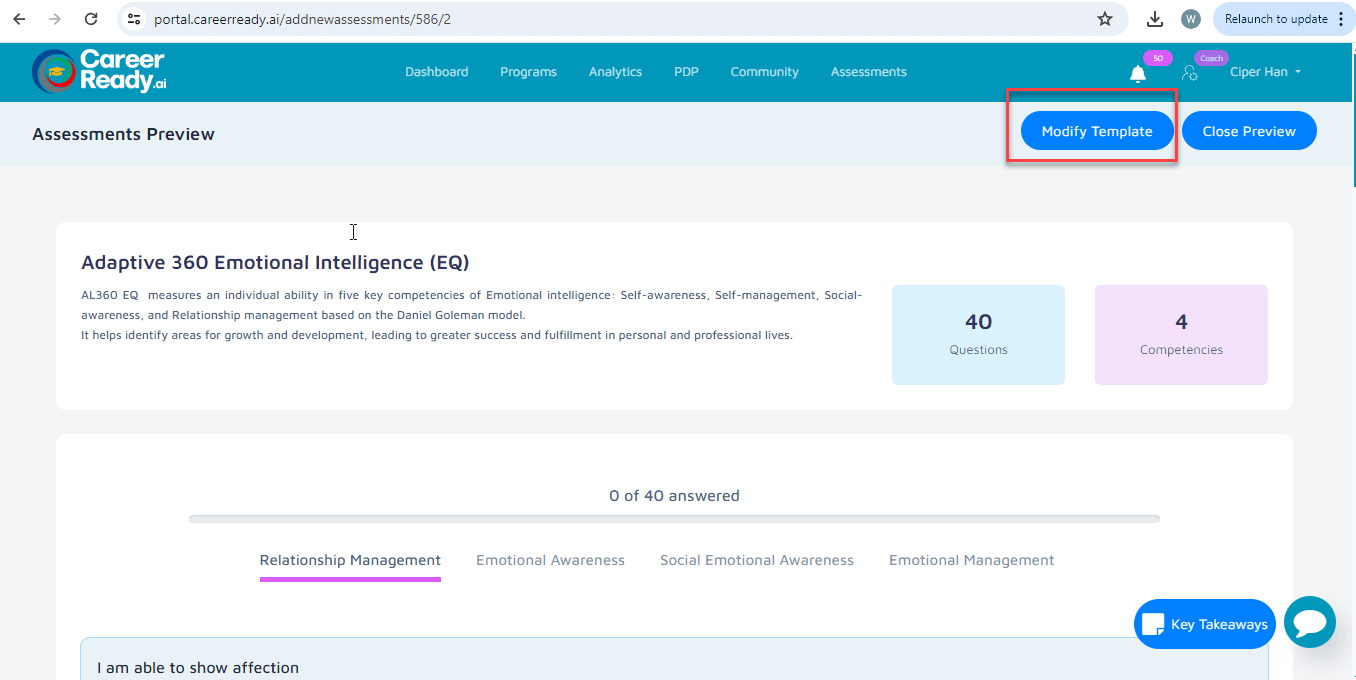
You can select the template you like and edit it as per your need by clicking on the “Modify template” button.
Customizing Your Assessment #
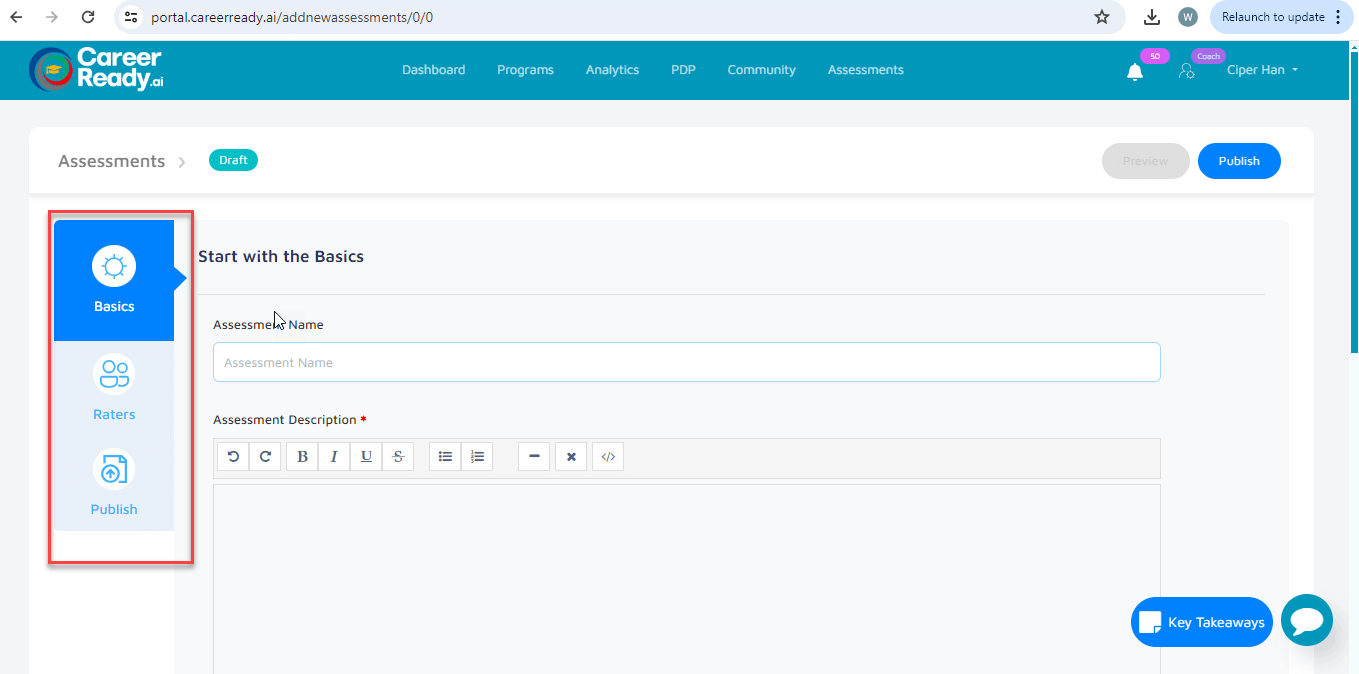
While modifying the template you can use the features from the left panel and can make it publish when you are done.
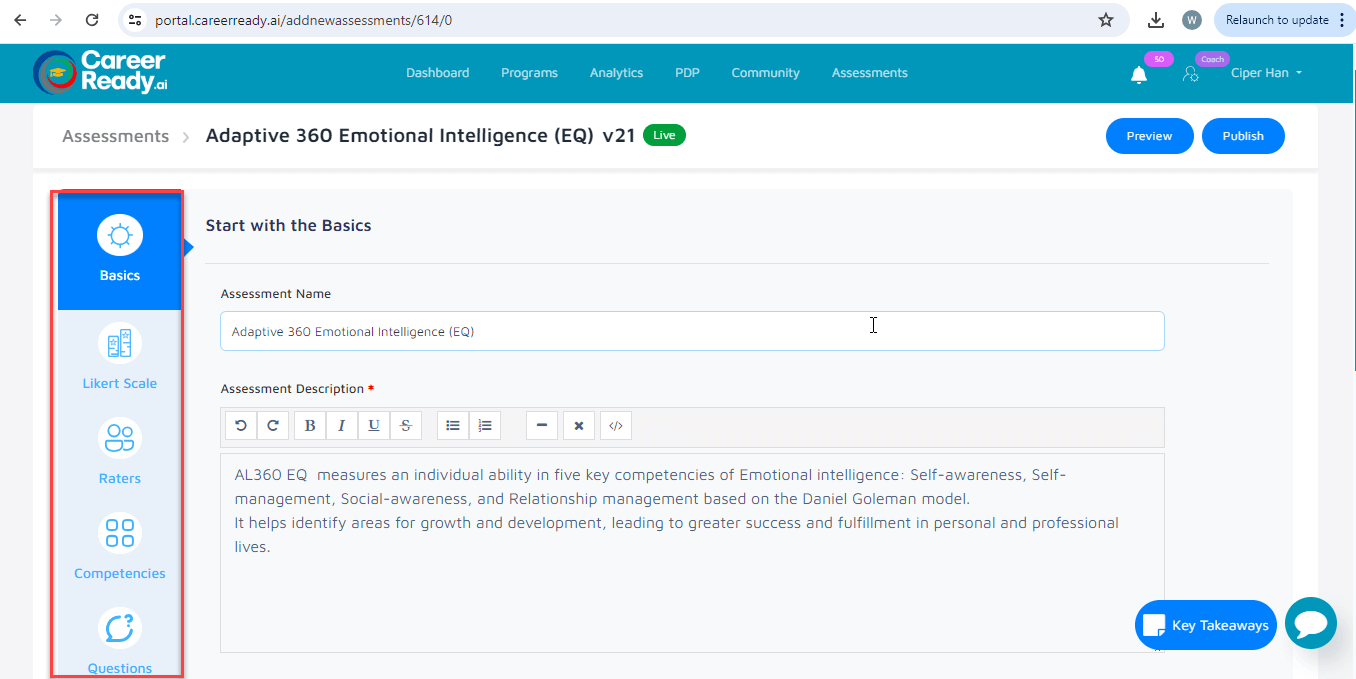
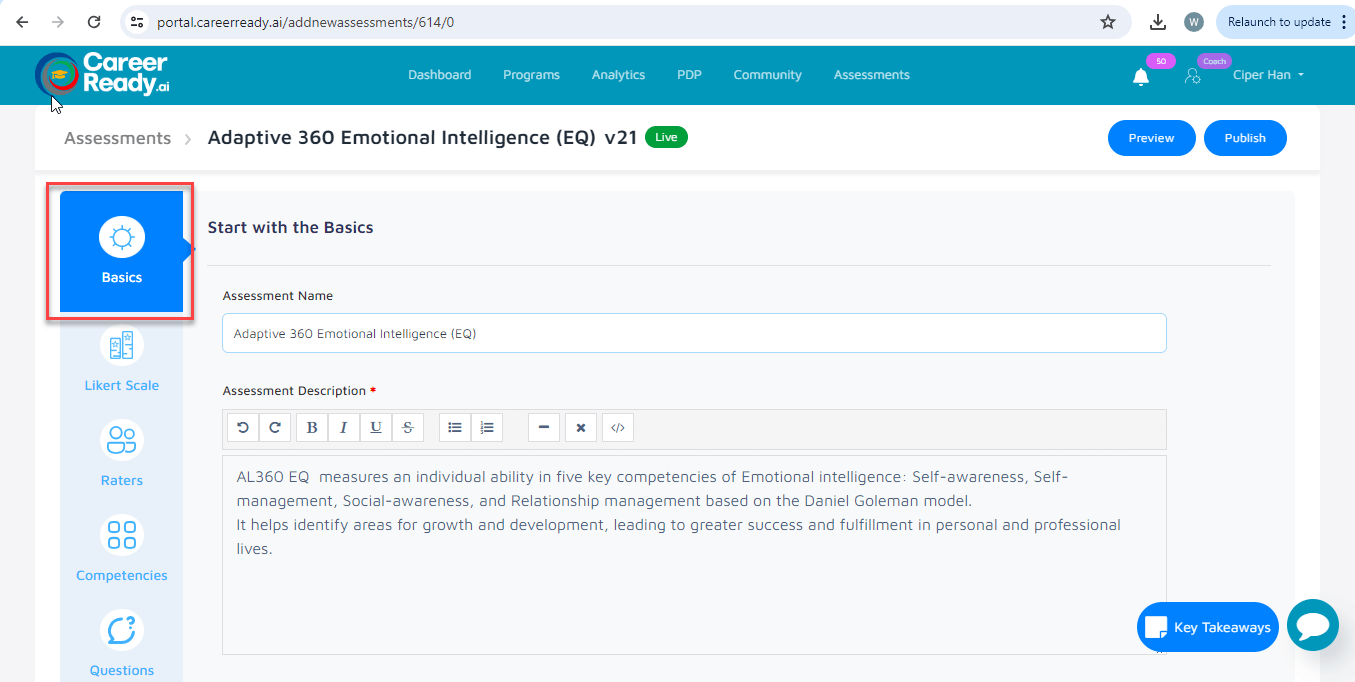
Basics #
In the basics tab, you can set the assessment name, and description and select the assessment type.
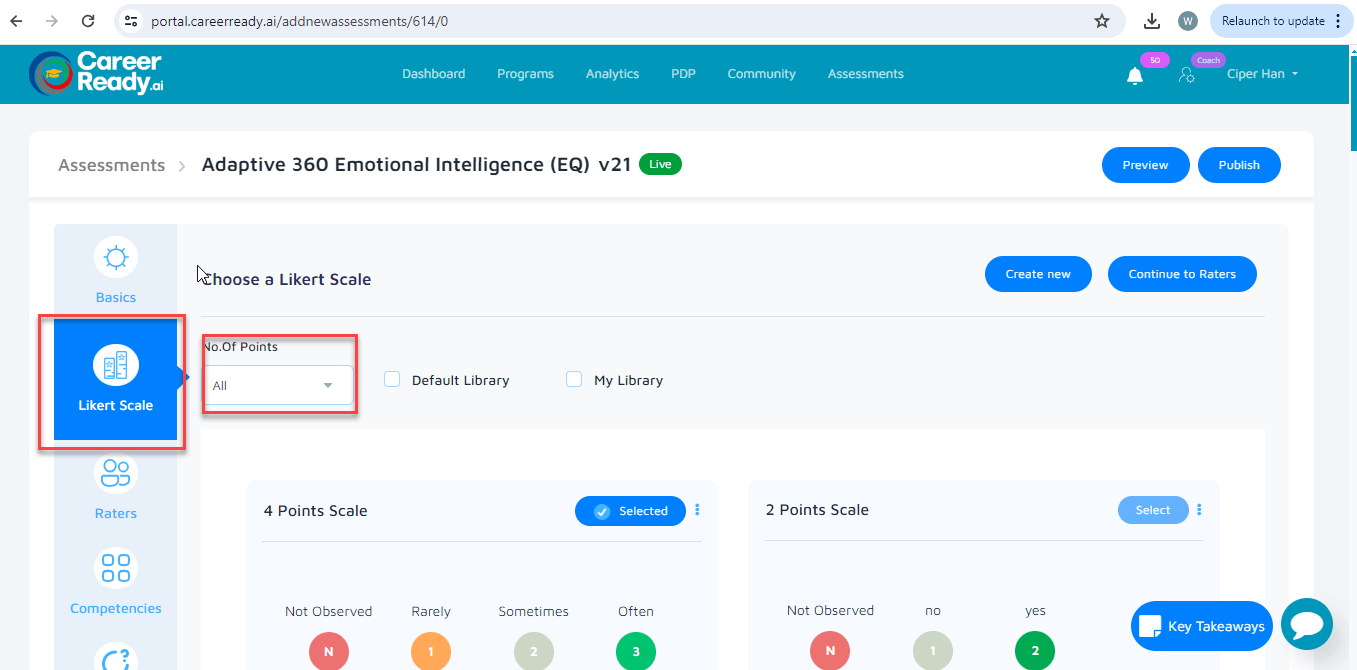
Likert Scale #
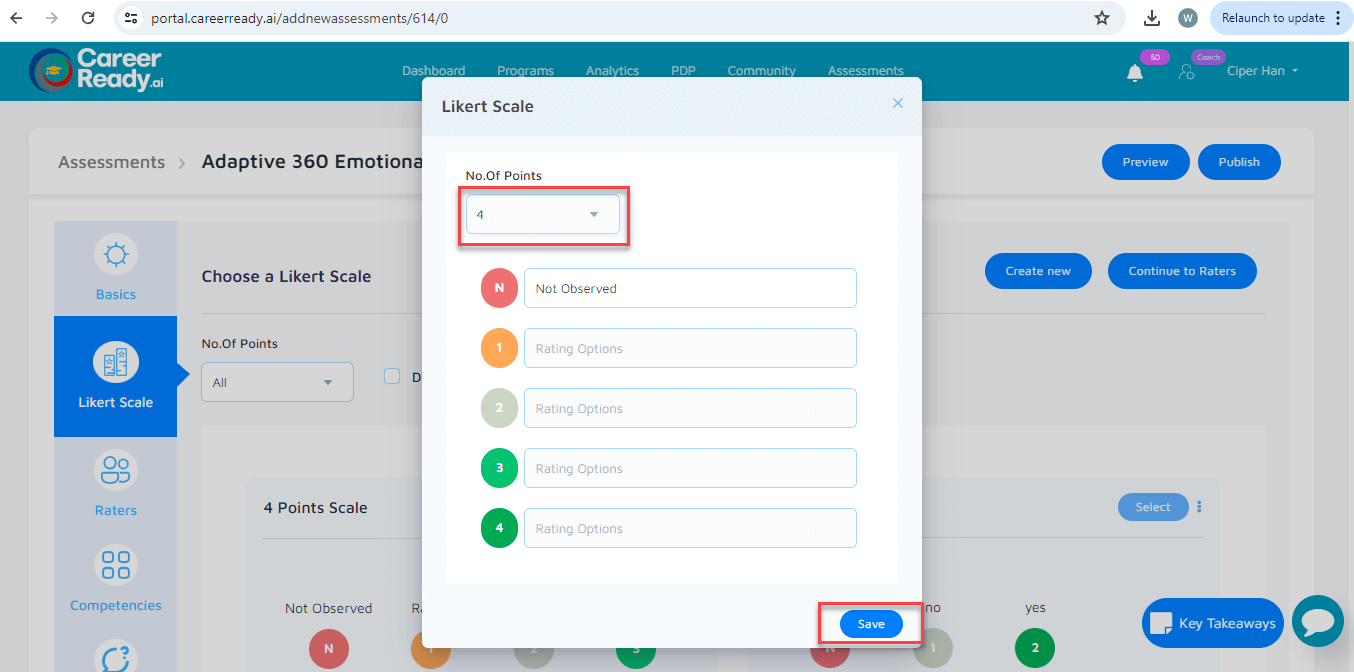
You can select the Likert scale of your requirement by choosing the number of points that you want.
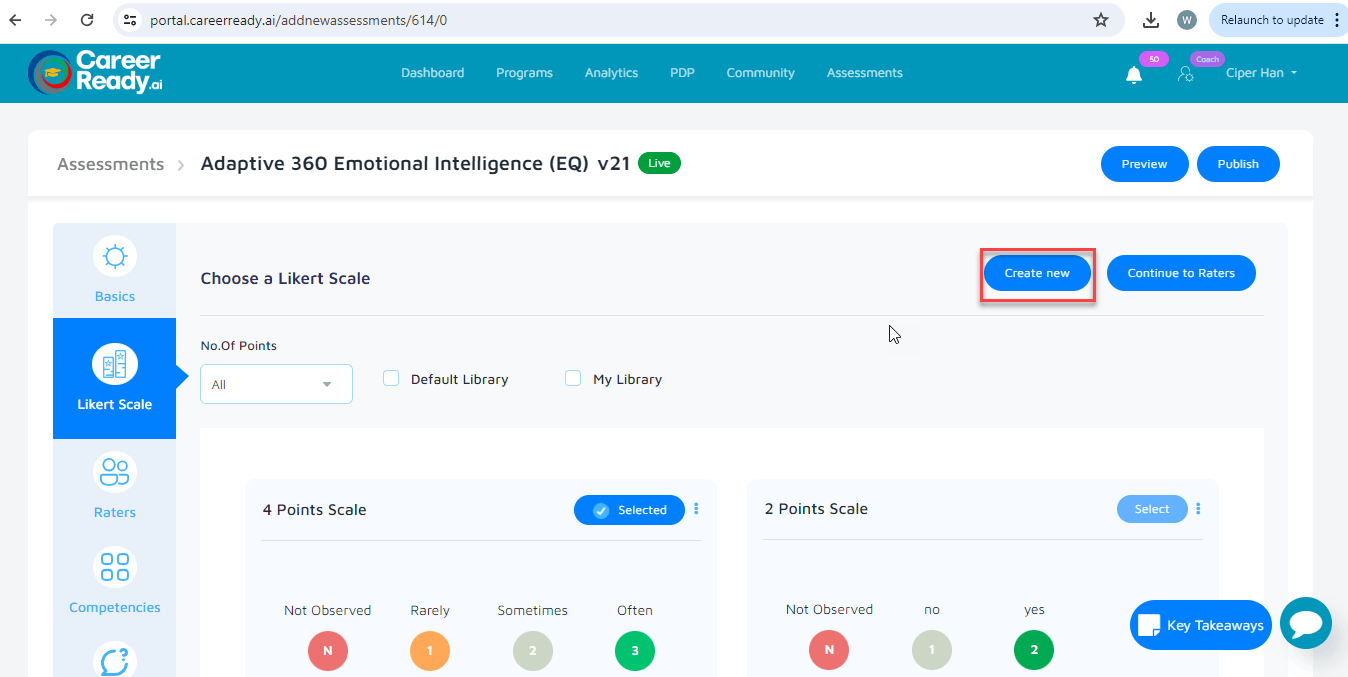
You can also create your own Likert scale by clicking the “create new” button and can customize a Likert scale for your assessment.
You can select the number of points for your Likert and can also name them. Once you are done with the changes, click on the save button and your Likert scale will be created.
Raters #
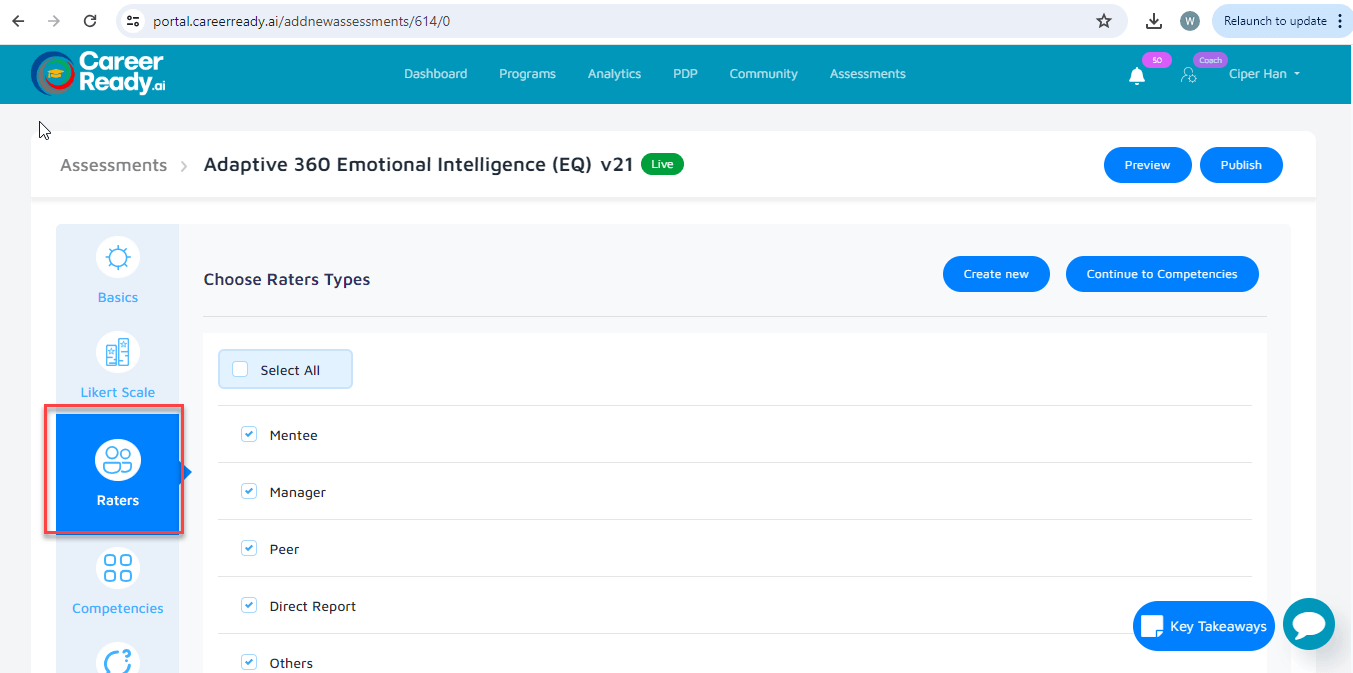
You can add the type of raters that you want in your assessment by checkboxing the mentioned list.
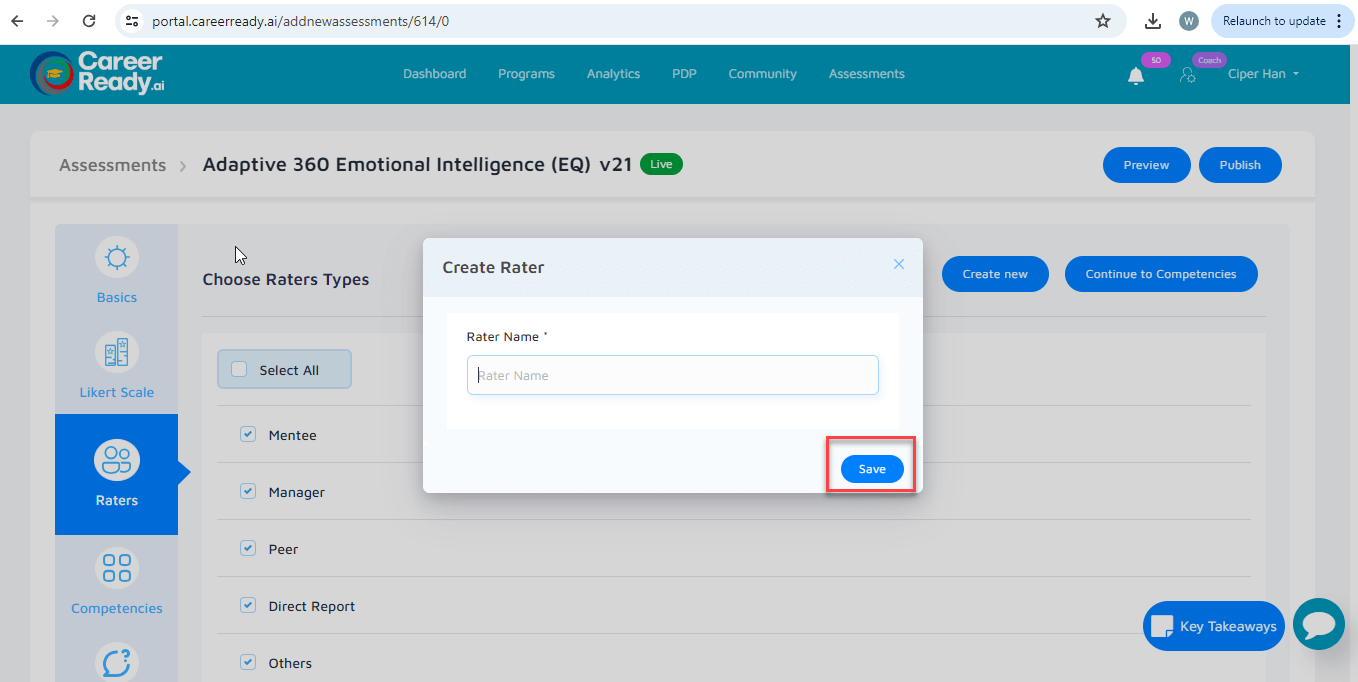
You can also create the type of rater that you need in your assessment by clicking the “create new” button.
Competencies #
You can select the competencies that you need in your assessment that are in the template or you can edit the name and description of the competency by clicking the edit icon next to each competency.
You can also change the sequence of the competencies by drag and drop.
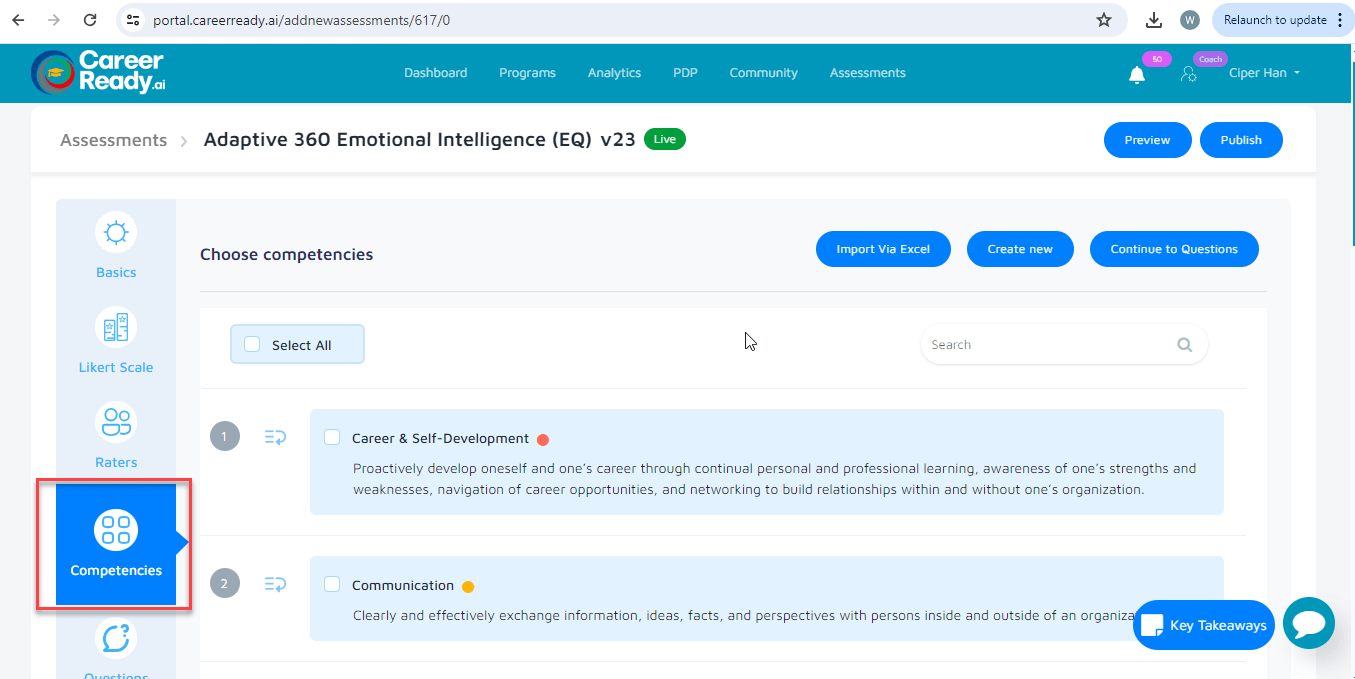
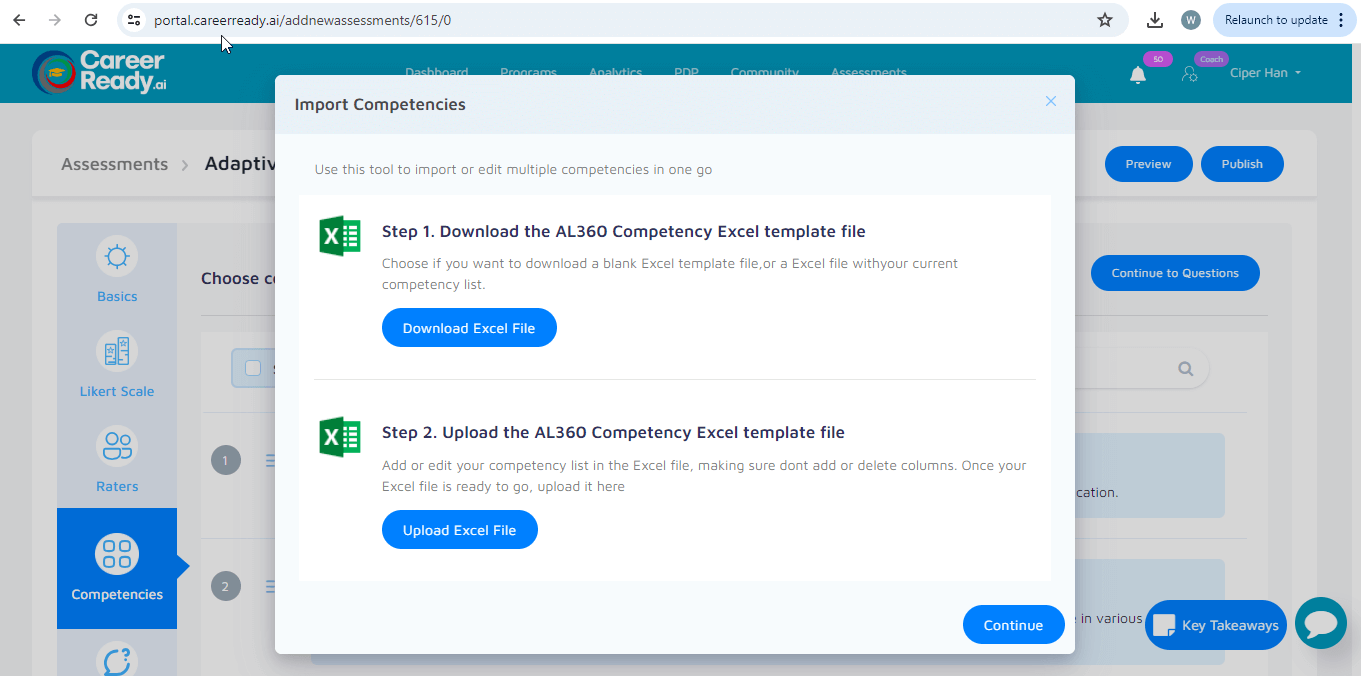
The coach can also import competencies, by clicking on the ‘import via Excel” button. Download the Excel file and add your competencies list along with their description and upload that file in the system, it will automatically add all the competencies to the assessment from the sheet.
Questions #
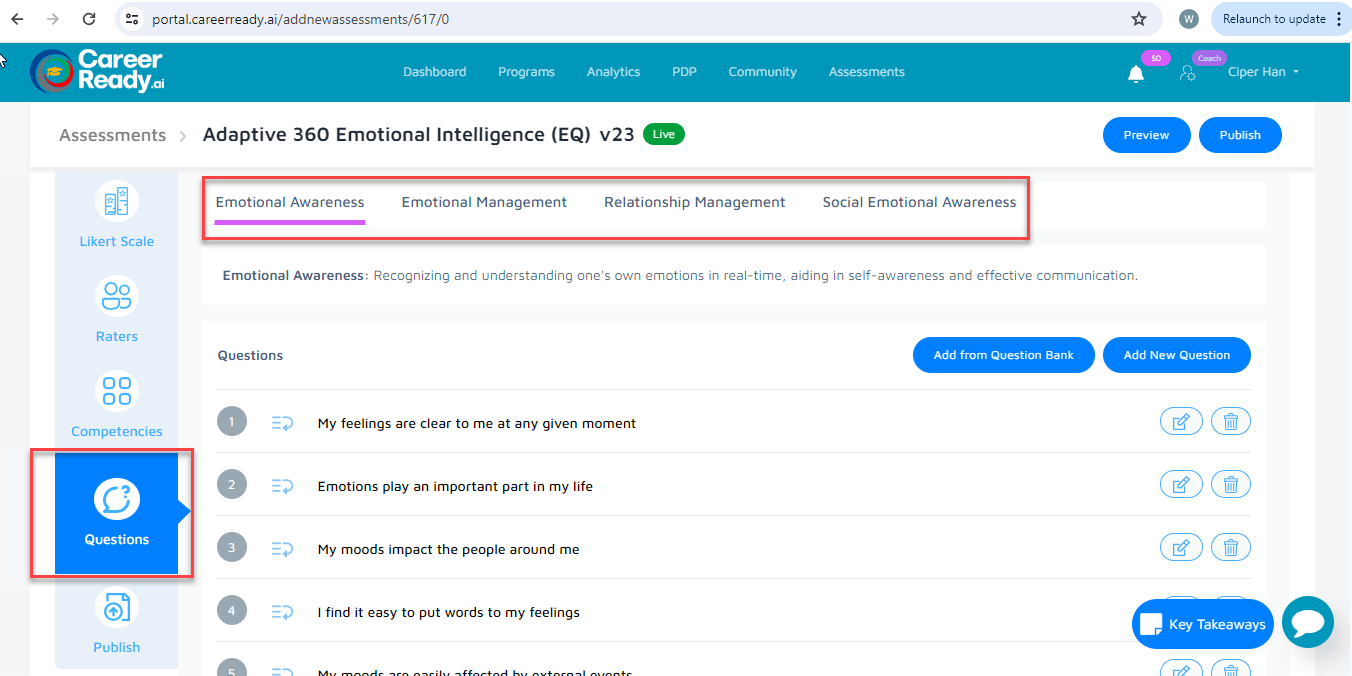
In the questions tab, you can select the question from the list wrt to each competency displayed on top.
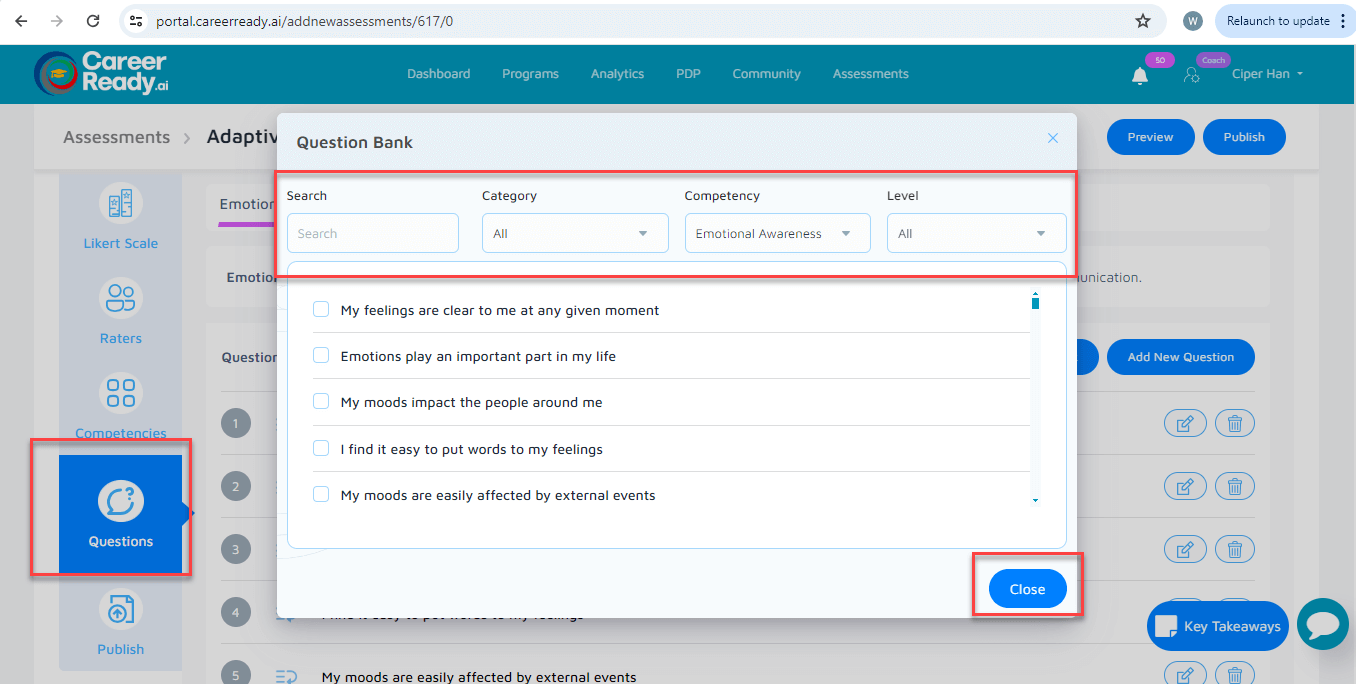
You can also select questions from the bank wrt to the category, competency, and level and add them to your assessment.
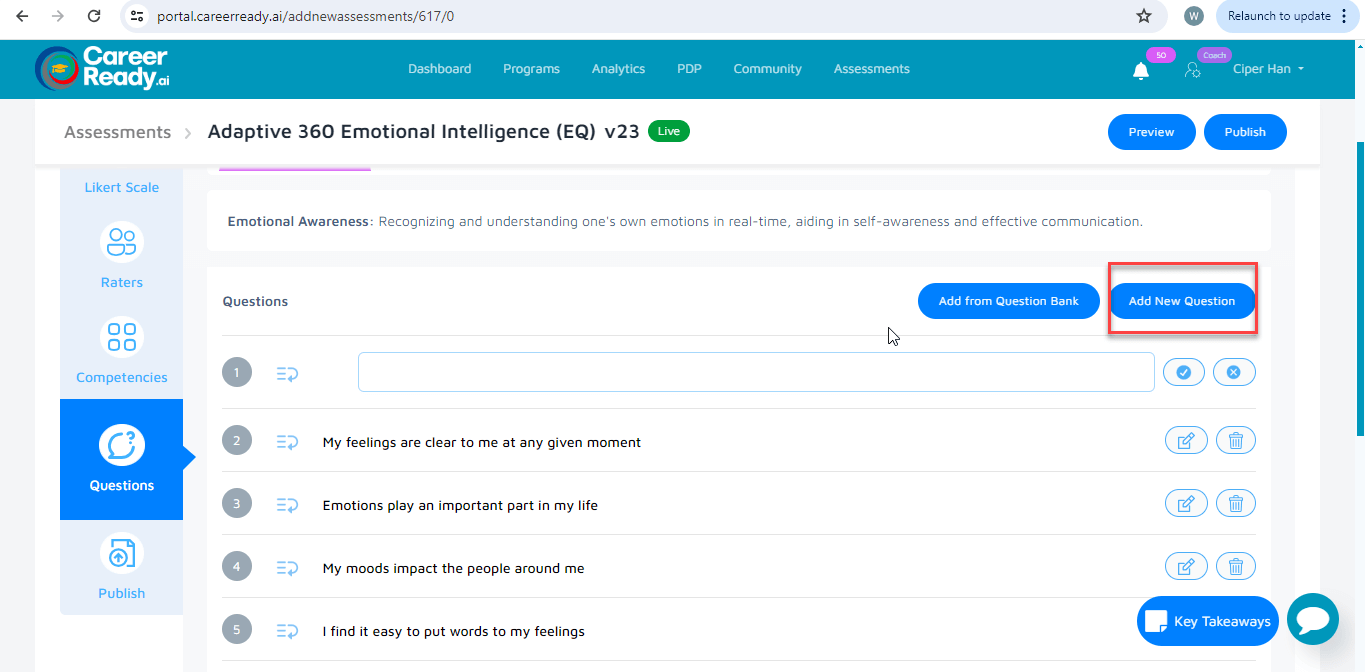
You can also create your own questions by clicking on the “add new question” option and by writing your question in the text field.
Publish #
Once you complete all the steps and add all the details for your assessment, you can make it published.
Creating assessment from scratch #
To create an assessment from scratch, go to the assessment tab. On the right top corner, click on the “create assessment” button and choose “from scratch”
Customizing Your Assessment #
Here you can design your custom assessment using the same steps as above in customizing your assessment section and make it publish.
